
|
|
|
||||||||
|
|
|||||||||
| Home | Forums | Register | Gallery | FAQ | Calendar |
| Retailers | Community | News/Info | International Retailers | IRC | Today's Posts |
 |
|
|
Thread Tools |
|
|
#1 |
|
Captain Awesome
|
1911 aluminum body
i havent decided which way to go yet, but im pondering the steps to both. its either get the aluminum blueing paste from sheeters edge or polish my frame and slide. my questions are;
does the gun blueing work well on aluminum, and what does it look like w/ finished (solid or washy look) how hard and what is required to polish the aluminum slide/ frame |
|
|

|
|
|
#2 |
 E-01 E-01 |
I've been looking at doing the same, except on an unknown alloy frame (most likely zinc-based). From the research I've done on hot and cold bluing, the blue won't "stick" on non-ferrous metals since it's a chemical reaction, but it can stain things like Aluminum (which will produced a washed, uneven finish).
If you're looking to achieve the "WW1 vintage" look, it may work. But if you want a clean, factory-new look... lemme know if you find something, I haven't yet (you could probably anodize or use some other type of finish, but thats more than I wanna spend on it. I may just use paint.)
__________________
|
|
|

|
|
|
#3 |
|
Captain Awesome
|
ya thats the dilema. i have the creation metal kit so i dunno if its any different than the others. that answered my question tho, i wasnt sure if it would blue it properly or be a spotty/ shabby look. so once i do that theres no giong back correct? if i dont like it im stuck with it.
i dont want to paint it as i dont want it to chip, anodizing is a little expensive and i dont feel is worth it, so polishing may be the only way to go. anyone else with knowledge om the blueing subject (or anyone thats doneth is) care to comment? and also anyone that has polished a pistol care to list the process, steps, materials? im looking for an almost nicjle plated look rahter than the brushed aluminum look, im not sure how to go about that. |
|
|

|
|
|
#4 | |
|
Captain Awesome
|
ok, so to cap this thread off, i tried it all. it was a very trying ordeal.
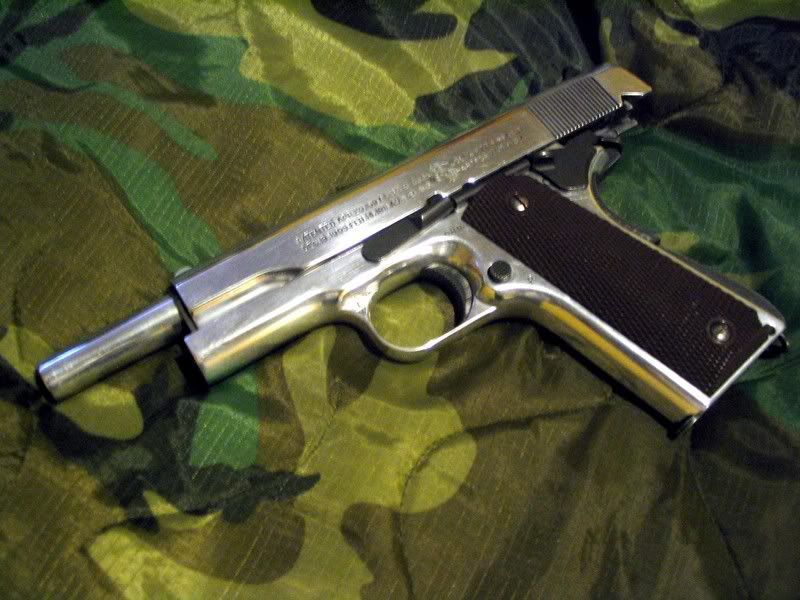
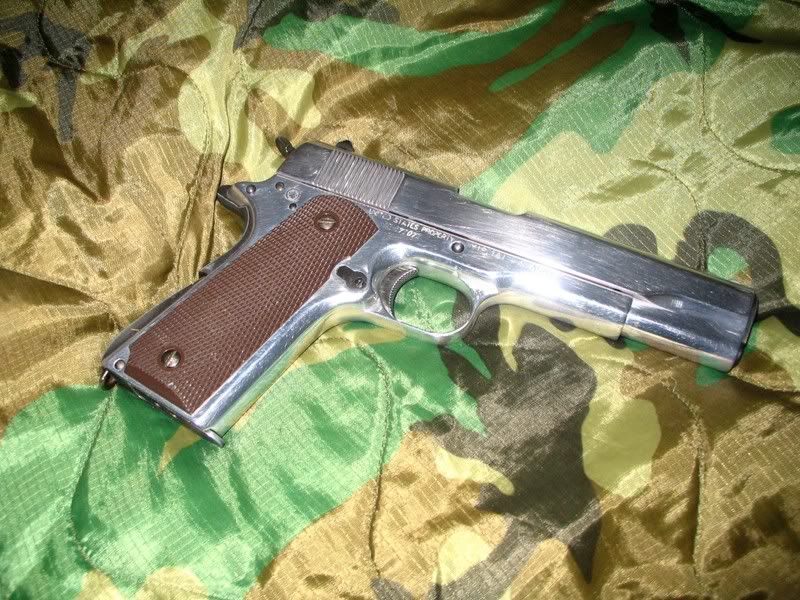
so i WANTED the classic ww2 era 1911, i think the finish on them is just beautiful. so i had hoped that i could achieve that with the alumi black. i THOUGHT it would be much like gun blueing, but nope... not at all. so where i started was, i stripped the old paint job off (hold on before you complain, it wasnt the stock paint job, it had been painted already in a way i didnt care to keep), it expose the bare aluminum underneath. i applied alumi black to it with no reasult except the edges, i quickly realised that it wasnt going to stain oxadized aluminum so i need to buff it all off. i tried that and the finish was... well it left alot to be desired and it wasn not as durable as i had hoped, it scratched easy and i figured going in and out of a holster frequently, it would wear off quickly. i tried several procedures to see if i could achieve the look i wanted, but each time the finish wound up looking caked on, not very smoth/ finished looking, it was an odd satin black look. it looked kinda like anm armalite barrel, whick looks good on a barrel, but not a pistol body. i didnt like it and wouldnt reccommend it for anything BUT a barrel fiish. happily and to answer my own question, all this procedure does is it causes a chemical reaction with the surface of the aluminum, the result is a carbon/ residue deposit (same idea as it oxydizing with the air, cept instead of grey its black), which CAN be buffed off, just like oxidization. i knew i didnt want to paint it as i wanted a durable scratch resistant finish and besides its a pistol, they dont look right "weathered" like a rifle, so polishing it was my next option and i did NOT want to do that. im not against bling guns, they look very nice, but not what i was looking to do, again i was going for a classic/ antique look, but at this point i was running out of options. so i buffed the affected portion off and polished it, and found that finish was just awful. since i had buffed it with a steel wire wheel, it had scored the surface up and when polished it looked like a cheap plastic dollar stor cap gun. the surface looked like a chrome orange peel and just horrible lol. so i was pretty discouraged at this point and didnt want to leave it at the dull grey oxadized aluminum look. thankfully my previous attempts were done on a small portion for testing purposes. so i was scuffing up the surface to remove the chrome orange peel look and realized that if i buffed it enough it smothed out the surface to make a mirror finish (yah, duh, i dunno why this didnt remember this before), and if i polished it after that, what would happen? eureka! lol. so this being my last viable option, i began buffing it. at first i was useing emry cloth/ scotch pad thing. it was working, but not well. i grabbed some fine 400 grit sand paper and tried that. i got results quicker, but it was still pain stakingly slow. im sure there is an easier way of doing this, but i didnt know it, nore had the equipment to do it. so i just used 400 grit paper and sat for a full 7 hours, im not kidding, it took me 7 hours to buff the oxadization off to expose the aluminum, then to wet sand it to get a clean finish and then fianlly polish it with a compount to shine it up and seal it. blistered thumbs, index, middle finger, and one hell ova sore back later this is the end result. again, not egsactly what i wanted but it does look very good and its kinda special as i put in the manuel time to do this. i call this my romeo and juliet gun lol. now all i need is a cross to hang off the bottom jk. but i do like it. (note this is 2 days later, and LOTS of oogling and handleing by everyone so the finish isnt a mirror quality as it was when i finished it)  
__________________
Age verifier southern Alberta  Quote:
Last edited by swatt13; February 20th, 2009 at 00:05.. |
|
|
|

|
|
|
#5 |
|
MrChairsoft
|
Mmmmmm, Nice and Blingy. I like it.
|
|
|

|
|
|
#6 |
|
Sexy.
|
|
|
|

|
  |
|
||||||
| Bookmarks |
| Thread Tools | |
|
|
 |