
|
|
|
||||||||
|
|
|||||||||
| Home | Forums | Register | Gallery | FAQ | Calendar |
| Retailers | Community | News/Info | International Retailers | IRC | Today's Posts |
 |
|
|
Thread Tools |
|
|
#1 |
|
Hello;
I am hoping that someone here can help me. I have looked all over the place but can't seem to find any instructions on how to disassemble my G&G M4 CQB-R Advanced so i can put on a new Lower Receiver. I can manage to remove the front pin (near the mag housing) but the rear one is practically impossible to remove. I dont know if thats just because its really stiff, if there is soemthing else i have to do first before trying to remove that pin, or if its not supposed to be removed at all. Please, someone help me. The pictures below are that of the gun in question. I would appreciate any and all assistance that you could provide me. |
|
|
|

|
|
|
#2 |
|
|

|
|
|
#3 |
|
Punch and rubber mallet.
G&G puts a stupid O-ring on that pin that makes it very difficult to get out without damaging your lower receiver. |
|
|
|

|
|
|
#4 |
|
Tys
|
You need to take off the stock and the grip first...it'll relieve pressure on the rear pin. Then knock the pin out.
Here's a step by step: 1. Remove upper from lower. Remove front pin, slide upper straight off of the lower...watch for wires/springs/catches. ****for a plastic lower G&G, I'd do this step after step 4 or 6 below...to minimize the risk of breaking the brittle part of the receiver around the front pin. 2. Remove stock (take off stock, undo long screw) 3. Remove grip (grip plate, motor, screws inside grip) 4. Remove mag catch (little screw holding the button onto the catch) 5. Remove rear pin 6. Remove flora pin (pin just above trigger) 7. Put selector in semi 8. pull mechbox out of lower. To put it back into a lower...do it in the following order: 7. 8. 1. This is important for the brittle G&G plastic receivers...it's a pain in the ass, but it takes the pressure off of trying to get the front pin in after everything's locked in place. 6. 5. 2. 3. 4. That's my personal opinion on how to deal with the fragile "clear" plastic lower hybrid guns. Maybe it's not such an issue now with newer models, but I've seen plenty with broken bodies up by the front pin. The order that I described, in my opinion, seems to minimize the stress on the body when assembling/disassembling it. Tys |
|
|

|
|
|
#5 |
|
Thanks to everyone who help me with this. It is successfully apart now! Now, can anyone tell me what kind of paint i should use?
Thanks! Kyle |
|
|
|

|
|
|
#6 |
|
Red Wine & Adderall
|
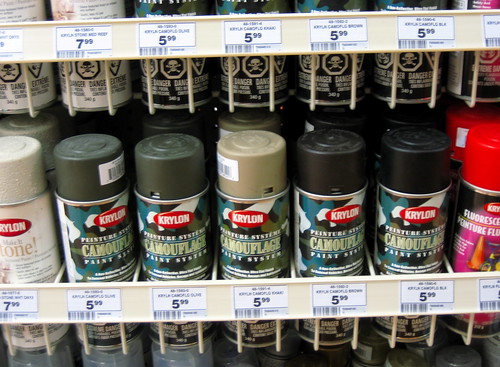
I believe a popular choice is the camouflage line by Krylon.

__________________
 "Its only a little bit on fire" |
|
|

|
|
|
#7 |
|
Cool, I'll go pick some up.
Now, i have run in to 1 more issue..... Can anyone tell me how to remove the trigger guard for this thing? Thanks; Kyle |
|
|
|

|
|
|
#8 |
|
It's VERY difficult to do on the G&G without breaking it...
Just keep it on and paint over it, you wont even notice. |
|
|
|

|
|
|
#9 |
|
Use masking tape and an xacto knife to cover just about any shape thing that you want to mask from the paint.
|
|
|
|

|
|
|
#10 |
|
Im actually installing a new lower receiver (same G&G one as before) so i guess i'll just have to live without the trigger guard. I'm still going to paint this new lower receiver though.
|
|
|
|

|
|
|
#11 |
|
Oh, well in that case... Punch + hammer again lol
|
|
|
|

|
|
|
#12 |
|
What I did for mine, was taking a small flat head screwdriver, and insert it in the pin, and to twist it like if I was unscrewing it.
(one wierd thing, my trigger guard front pin had only 1 entry point.)
__________________
|
|
|
|

|
|
|
#13 |
|
Tys
|
We'll removing it from the other one isn't hard....LOL
Putting it into the new one can be very tricky. With those delicate bodies I make sure the pin is a good fit for the hole (and alter the hole if necessary). I then squeeze the pin in using a block on the other side to support the plastic. Even then...if the pin is too big for the hole it'll crack it. Go easy on it. |
|
|

|
|
|
#14 |
|
Thanks, i'll try that..... I just finnished the AWSOME paint job that I did for the lower receiver. Looks like it came from the factory. That Krylon paint is the best! I will post the pictures sometime soon so you can see the difference.
|
|
|
|

|
|
|
#15 |
|
Ok, this is the fully painted version. Look a hell of alot better. Don't you think?
|
|
|
|

|
  |
|
||||||
| Bookmarks |
|
|
 |